Picture hanging tools

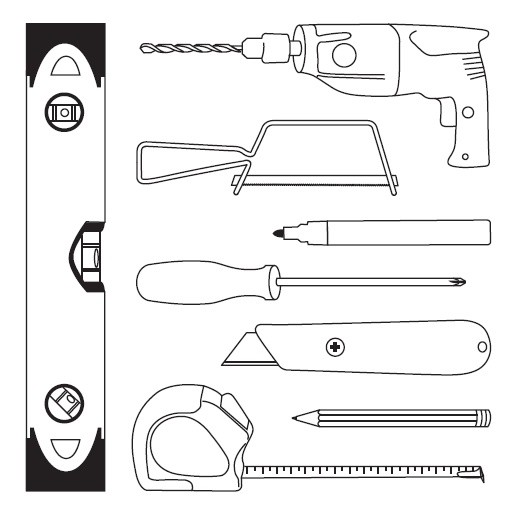
The basic tools you need for picture hanging are:
 - Water level tool
 - Drill
- Hacksaw
- Marker
- Screwdriver
- Stanley knife
- Pencil
- Tape measure
Check our picture hanging manuals for detailed information. Download them in pdf format. Easy step-by-step explanation with clear pictures guide you through the process.
Manual minirail
Manual cliprail pro
Manual cliprail max
Manual j-rail max
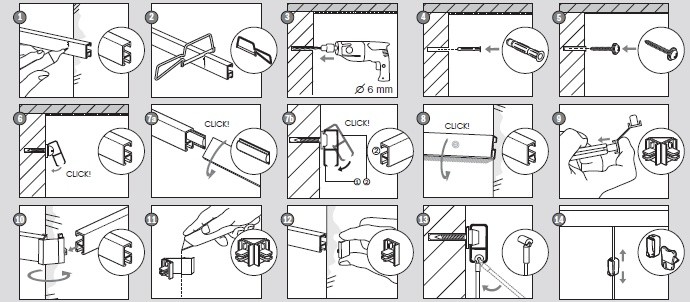
Manual prorail flatHere's an example of the STAS minirail manual:
 Use a marker to specify the point where the picture rail needs to be sawn. Use the hacksaw to saw the rail to the required length. The water level tool helps you to install the rail straight. Mark the spots for the screws with a pencil (use the tape measure for correct distances). Drill the holes for the screw plugs with a diameter of 6 mm. Use the Stanley knife to splice a combicap for two endcaps.
 These are about all the picture hanging tools you need! And the best part is: after installing a picture hanging system you'll never need to use tools again, when hanging your pictures.... Back to Picture hanging overview.

